Wednesday, May 25, 2011
Rounded Rect Image in iPhone
I am a woman of few words... so forgive me if I don't go about making stories
while explaining each and everything ... In my opinion, the picture speaks a
thousand words and video million of words.. as of now I can't do video tutorial right now
..I might eventually if I keep getting the developers support.
In my code, I have used DrawClass2 for creating the rounded rect image.
Note: Its not the rounded borders, it the rounded rect edges of image itself.
In MainClassController.m,
I have attached DrawClass2 view.
In DrawClass2.m
You can change the radius value to effect the roundedness of image'e edges.
For radius = 10.0, it looks like :

For radius = 20.0, it looks like :

while explaining each and everything ... In my opinion, the picture speaks a
thousand words and video million of words.. as of now I can't do video tutorial right now
..I might eventually if I keep getting the developers support.
In my code, I have used DrawClass2 for creating the rounded rect image.
Note: Its not the rounded borders, it the rounded rect edges of image itself.
In MainClassController.m,
I have attached DrawClass2 view.
In DrawClass2.m
You can change the radius value to effect the roundedness of image'e edges.
For radius = 10.0, it looks like :
For radius = 20.0, it looks like :
Still waiting to find fast internet .. to finish upload of code.
It exists on this LINK.
Tuesday, May 24, 2011
Mosaic Effect - Part II
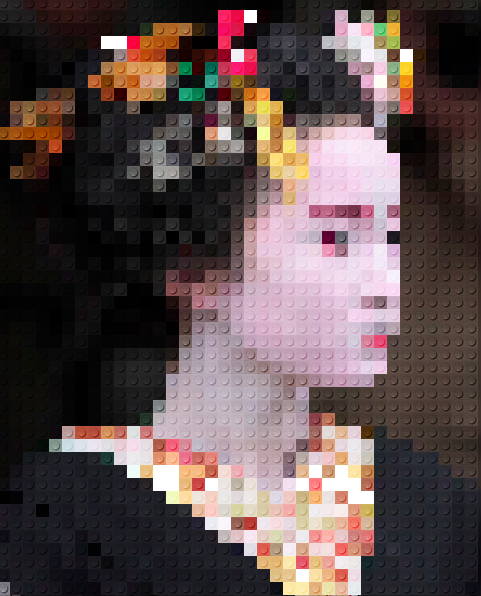
Here is the result of my second attempt to being more variety in mosaic effect.


I introduced some eastman effect into it and got following result.
This is with purely white background.
I tried increasing the tile size of the mosaic and it looks like this now !
Create Vector Image using Quartz
So, here I am laying in my hotel room bored, so I thought to write this code for creating vector image using quartz, and here is the result of my last 2 hours.


Applying the same piece of code gives following result... looks pretty cool for now :)

I was actually looking for photoshop tutorial on vector images, and I found some. One of them was using following image, so I downloaded it and tried on that too.. Result looks very close to what he made with photoshop!


Looks like this image is going to be very popular, so this image given below is the original image.

If you see the code , then you will be able to find the code for filter 1, after filter 1 was applied, the image looked like following
After filter 2 was applied, the unwanted white dots were removed.
After filter 3 was applied, the black area became more smoother ! and I would call this as my final result!

Applying the same piece of code gives following result... looks pretty cool for now :)

I was actually looking for photoshop tutorial on vector images, and I found some. One of them was using following image, so I downloaded it and tried on that too.. Result looks very close to what he made with photoshop!

How to find if NSString has specific characters
NSCharacterSet * set = [[NSCharacterSet characterSetWithCharactersInString:@"abcdefghijklmnopqrstuvwxyzABCDEFGHIJKLKMNOPQRSTUVWXYZ"] invertedSet];
if ([strValue rangeOfCharacterFromSet:set].location == NSNotFound)
NSLog(@"character found");
else
NSLog(@"no character found");
Create Mosaic with your Image - Part 1
I have written a code to create a mosaic effect on the image.
Original Image:

Mosaic Image:
Mosaic Tile width used here is 5 px x 5px. You can change it in the code as well to whatever px you want in MosaicView.m in the following lines.
int _widthOfTile=5;
int _heightOfTile=5;
Once you are on the next page, you will see the original image.
You tap on it , then you will be able to see the mosaic image.
You tap on it again, it back to original image again.
I will be writing more variations of this mosaic effect and posting it here on the blog soon.
Note: I don't hold the copyright of these images, they are used only for the coding testing purpose here.
Sunday, May 22, 2011
Quartz Tutorial -Part II (Introduction to shadow and rounded rect borders )
This tutorial is about how to have the rounded rect borders and shadows behind your image views.
Following image is the result of 4 experiments codes.

For Image 1:
You can download the code from here
Following image is the result of 4 experiments codes.
For Image 1:
//Image is with rounded rect borders
//point to be noted: Image itself is not rounded rect here , only borders.
//The shadow is implemented for the view sub class
//This will let you have shadow as well as rounded rect borders.
DrawClass1 *myDrawScreen1=[[DrawClass1 alloc]initWithFrame:CGRectMake(50, 550, 120, 120)];
myDrawScreen1.layer.cornerRadius=5;
myDrawScreen1.layer.borderWidth=5;
myDrawScreen1.layer.borderColor=[UIColor blackColor].CGColor;
myDrawScreen1.layer.shadowColor=[UIColor grayColor].CGColor;
myDrawScreen1.layer.shadowOffset=CGSizeMake(2, 2);
myDrawScreen1.layer.shadowOpacity=1.0;
[self.view addSubview:myDrawScreen1];
For Image 2:
//Simple View with Image and no shadow
//Only rounded rect borders
DrawClass1 *myDrawScreen2=[[DrawClass1 alloc]initWithFrame:CGRectMake(200, 550, 120, 120)];
myDrawScreen2.layer.cornerRadius=5;
myDrawScreen2.layer.borderWidth=5;
[self.view addSubview:myDrawScreen2];
For Image 3:
//ImageView directly implemented on viewcontroller
//Not through UIView subclassing
//Imp: cornerRadius doesn't seem to work for UIImageView
//if you remove myImageView.layer.masksToBounds=YES;
//But if you do include that line to have rounded rect,
//then shadow doesn't work. :)
UIImage *imgToBeClipped=[UIImage imageNamed:@"pic1.png"];
UIImageView *myImageView=[[UIImageView alloc]initWithFrame:CGRectMake(350, 550, 110 ,110)];
myImageView.layer.cornerRadius=5;
myImageView.layer.masksToBounds=YES;
myImageView.layer.borderWidth=5;
myImageView.layer.borderColor=[UIColor blackColor].CGColor;
myImageView.layer.shadowColor=[UIColor grayColor].CGColor;
myImageView.layer.shadowOffset=CGSizeMake(2, 2);
myImageView.layer.shadowOpacity=1.0;
[myImageView setImage:imgToBeClipped];
[self.view addSubview:myImageView];
For Image 4:
//ImageView with just shadow
//and borders
UIImage *img=[UIImage imageNamed:@"pic1.png"];
UIImageView *myImageView1=[[UIImageView alloc]initWithFrame:CGRectMake(500, 550, 110 ,110)];
myImageView1.layer.borderWidth=5;
myImageView1.layer.borderColor=[UIColor blackColor].CGColor;
myImageView1.layer.shadowColor=[UIColor grayColor].CGColor;
myImageView1.layer.shadowOffset=CGSizeMake(2, 2);
myImageView1.layer.shadowOpacity=1.0;
[myImageView1 setImage:img];
[self.view addSubview:myImageView1];
You can download the code from here
Wednesday, May 18, 2011
Quartz iPhone/iPad Tutorial - Part I
I have written quartz tutorial, for solid border strokes, filled shapes, border with dotted lines, shapes with gradient filled. screenshots are attached for some of the drawings.


How to load 1000s of UIImageView on UIScrollView !
Now I have had experience where my juniors came across the problem of how to fit so many UIImageView on the UIScrollView .. won't it do havoc on the memory to load 100s of them at the same time..
Hence I took time to write the blog about how to go about adding 1000s of UIImageViews on the scrollview. This code has the horizontal scroller in the bottom of the screen and each page of scrollview has like 4 UIImageView on it.. There are total 4000 UIImageViews embedded on the scrollview. When user presses any imageview on the scroller, that image is displayed on the top in bigger view.
I have applied the methods of loading 3 pages at a time.
Unload any previous pages on scrollview - Load Previous Page - Load Current Page - Load Next Page - Unload any other next page.
Suppose you have pages as following on your scrollview
Page 1- Page 2- Page 3- Page 4- Page 5- Page 6- Page 7- Page 8- Page 9
When application starts, it loads Page 1 and Page 2 before you even see the screen.
You scroll to the right
If Page 2(already loaded in the memory) is your current Page, then you load page 3(so that when you scroll from current page to page 3, it is smooth as the page 3 is already loaded in the memory) and keep the page 1 in memory because if user goes from page 2 back to page 1, then it is smooth scrolling with preloaded images and you wont need to load the page again.
You scroll more to the right.
You unload the Page 1 from your scrollview.
If Page 3(already loaded in the memory in the previous step) is your current Page, then you load page 4(so that when you scroll from current page to page 4, it is smooth as the page 4 is already loaded in the memory) and keep the page 2 in memory because if user goes from page 3 back to page 2, then it is smooth scrolling with preloaded images and you wont need to load the page again.
Now, let assume if user goes back from Page 3 to Page 2.
You unload Page 4.
You already have Page 2 and Page 3 in the memory.
You load Page 1.
Because at any time, you can have only n-1,n and n+1 page with image views loaded in your scrollview where n is your current page, you have to unload any other pages which includes n-2, n-3 (with n-m > 0) and n+2,n+3 (with n+m < total pages).
It looks like the screenshot below.

You can download the code from here
Hence I took time to write the blog about how to go about adding 1000s of UIImageViews on the scrollview. This code has the horizontal scroller in the bottom of the screen and each page of scrollview has like 4 UIImageView on it.. There are total 4000 UIImageViews embedded on the scrollview. When user presses any imageview on the scroller, that image is displayed on the top in bigger view.
I have applied the methods of loading 3 pages at a time.
Unload any previous pages on scrollview - Load Previous Page - Load Current Page - Load Next Page - Unload any other next page.
Suppose you have pages as following on your scrollview
Page 1- Page 2- Page 3- Page 4- Page 5- Page 6- Page 7- Page 8- Page 9
When application starts, it loads Page 1 and Page 2 before you even see the screen.
You scroll to the right
If Page 2(already loaded in the memory) is your current Page, then you load page 3(so that when you scroll from current page to page 3, it is smooth as the page 3 is already loaded in the memory) and keep the page 1 in memory because if user goes from page 2 back to page 1, then it is smooth scrolling with preloaded images and you wont need to load the page again.
You scroll more to the right.
You unload the Page 1 from your scrollview.
If Page 3(already loaded in the memory in the previous step) is your current Page, then you load page 4(so that when you scroll from current page to page 4, it is smooth as the page 4 is already loaded in the memory) and keep the page 2 in memory because if user goes from page 3 back to page 2, then it is smooth scrolling with preloaded images and you wont need to load the page again.
Now, let assume if user goes back from Page 3 to Page 2.
You unload Page 4.
You already have Page 2 and Page 3 in the memory.
You load Page 1.
Because at any time, you can have only n-1,n and n+1 page with image views loaded in your scrollview where n is your current page, you have to unload any other pages which includes n-2, n-3 (with n-m > 0) and n+2,n+3 (with n+m < total pages).
It looks like the screenshot below.
You can download the code from here
UIBezierPath tutorial for iPhone SDK 4.0 - Part 1
I was going through how to use UIBezierPath and what are its possible uses.. and I must say it is one hell of a convenient tool ! Ofcourse you can draw normal drawing with it as shown below and use your app as sketching pad in addition to that it adds so much convenience with the undo and redo action(will write that tutorial too next) that I fell in love with the use of UIBezierPath. You can have simple drawing as well as pattern based brush tip. It is sooo easy to use this as pencil too that I don't even have words !
You can init the UIBezierPath as following
UIBezierPath *myPath=[[UIBezierPath alloc]init];
myPath.lineWidth=10;
brushPattern=[UIColor redColor]; //This is the color of my stroke
Then you have Touch methods which handle and track the coordinates of your touch. When your touch begins on the screen, you ask UIBezierPath to move to that touch point
UITouch *mytouch=[[touches allObjects] objectAtInd
[myPath moveToPoint:[mytouch locationInView:self]];
As you move your finger around, you keep adding those points in your BezierPath in TouchMoved method by following
UITouch *mytouch=[[touches allObjects] objectAtIndex:0];
[myPath addLineToPoint:[mytouch locationInView:self]];
As we need constant refreshing of the screen, so that as soon as we draw it appears on the screen, we refresh the UIView subclass by calling following method in TouchMethod so that as soon as there any change in the BezierPath, it is reflected on the screen.
[self setNeedsDisplay];
Talking about drawRect Method which does all the drawing for you, you need to set the color of your stroke(stroke color means the color with which painting will be done on screen.) on screen and also the blend mode. You can try different blend mode and see the result.
- (void)drawRect:(CGRect)rect
{
[brushPattern setStroke];
[myPath strokeWithBlendMode:kCGBlendModeNormal alpha:1.0];
}

Pattern brush.. doesn't exactly work the way it is in Photoshop , because once you fill the whole screen with your drawing, the screen looks completely like a screen full of tiles of your pattern which is not what I would want but ... thats what we have so far in terms of pattern brush. I am trying to implement the brush with opengl lets see if I succeed then I will post it here !
myPath.lineWidth=10;//This can help you in setting width of your stroke/brush
brushPattern=[[UIColor alloc]initWithPatternImage:[UIImage imageNamed:@"pattern.jpg"]]; //You can set pattern in your color of your brush so that the strokes will appear with pattern of your image.

You can download the code HERE
Update:
Thanks to Sonia for pointing it out , wanted to know about smoothing of edges of bezier path, so that it doesn't look distorted . You can change the capStyle of line for that. I have changed it and updated the code at above link.

Well.. Finally implemented and uploaded code implementing Undo-Redo.
POSTED HERE
Very easy way to create pie charts in your iPhone app !
Well.. I haven't been across many pie chart creating APIs for iPhone/iPad app.. Here is my effort to make it as easy as I could for other developers looking to create pie chart in your app.
This post also makes clear the use of anti-alias stuff while you are drawing on your context.
The first pie chart diagram doesn't use the anti-alias but the second one does hence you can see in the screenshot attached with this post its looks so smooth ! For incorporating the anti-alias stuff in your drawing you need to include only 2 lines as following:
CGContextSetAllowsAntialiasing(context, true);
CGContextSetShouldAntialias(context, true);
If any one of them above is false then you will not have anti-alias work for you.
How to use this pie-chart code?
In MainClass:
You will see following lines
myPieClass.itemArray=[[NSArray alloc]initWithObjects:@"12",@"84",@"44",@"55",@"100", nil];
myPieClass.myColorArray=[[NSArray alloc]initWithObjects:[UIColor purpleColor],[UIColor redColor],[UIColor orangeColor],[UIColor yellowColor],[UIColor greenColor], nil];
So you give your own values to itemArray , code will automatically calculate the angle and offset stuff for you. You also need to give the color for each segment of the pie chart. The number of items in myColorArray should be equal to number of items in itemArray. And according to above array values for color, pie segment with value 12 have purple color, pie segment with value 84 will have red color.
Just to make it more clear: Suppose your created a budget application and you have 5 categories of expense type,
now your total for category 1 is 12
total for category 2 is 84
total for category 3 is 44
total for category 4 is 55
total for category 5 is 100
So, you have to give here the raw values... in order to create your pie chart. Dont give angles value in itemArray as code calculates the angles itself as mentioned above.
As you can see in the picture below.

NEW !! MIM Chart library has been released in Alpha 1.0 version, It includes Line Graph, Bar Graph and many other kinds. You can find more info and download HERE
Subscribe to:
Posts (Atom)